

When my faves over at Young House Love and Bower Power posted the latest challenge last week I screeched, and then immediately IM'd the hubs to let him know that it was time to do something I'd been talking about for months. No more stalling. No more excuses. I was going to build a pallet couch for the front porch, and the poor guy was going to be stuck helping me whether he liked it or not. Thankfully, he was (sort of) on board, and I managed to sucker my crafty mom into helping me as well. High fives for teamwork!
There is an endless supply of inspiration on Pinterest for pallet couches, but my very favorite - and first one I ever saw - is from a blogger I truly admire, Ashley Ann of Under the Sycamore.

I wrote a few weeks ago about how our porch has been a revolving mess of craigslist and garage sale furniture since we bought our house. As the weather has warmed up I've become obsessed with the idea of having game nights with drinks and snacks out there, so figuring out a way to affordably furnish the space for real became a major priority for me. I knew it would be way more affordable, way more "us" and way more fun to tackle a DIY couch instead of just buying something... and thanks to lots of help and this latest Pinterest Challenge giving me a bit of a self-imposed deadline, that's exactly what happened!
I'll post a full "tour" of the porch next week because I am genuinely in love with it, but for now let's just focus on the couch shall we?!? I realized that most of the couches on Pinterest don't offer much of a real tutorial, so I've made an attempt at that here. Enjoy!
Step 1: Get your hands on some pallets. I posted a facebook status asking if anyone knew where I could get some and got super lucky that my pal Tim's cousin works somewhere sorta local with pallets and was willing to pass a few my way for a mere $2 each. Thanks John! If you don't have a John in your life, check craigslist for pallets.
Step 2: Cut the pallets in half. This is only necessary if your space is skinny like ours - many of the inspiration images I've seen use the pallets at their full depth, but we don't have that kind of room.

The pallets we had were 40"x48". Dan cut 3 in half to 40"x24", and cut one down even further to 20"x24" to make a little corner section. Here's a layout for reference -

Step 3: Stack the pallets in your space. Here's half of ours on the porch, which we did to get an idea of how it was all going to look. Don't mind the awful rug, it's on it's way to the dumpster as we speak.

Step 4: Gather supplies for your cushions. We decided on 2 big bench-type cushions instead of several smaller ones. Here's what you need:
- Ridiculously expensive foam. Seriously, why on earth does the stuff cost so much?!? The good news here was that big giant slabs of foam just happen to be 24" wide, which was exactly the size I needed. The slabs were also 72" long, which meant I only needed two, and thanks to 40% off Hancock Fabrics coupons weren't too pricey.
- A roll of batting. This was my mom's suggestion, and I'm glad I listened as it helped keep the fabric all nice and smooth.
- Fabric. I found a great pattern I loved at Ikea for $6.99 a yard. 5 yards did the trick!
- Plywood cut to size. Dan bought one sheet and had Home Depot cut it down for us, which kept the whole thing simple!
- Staple gun. And a hammer for when you inevitably don't get the staples in all the way the first time.
Step 5: Build your cushions!
First, we used a little spray mount to attach the foam to the plywood. Then flipped the whole thing over, laid the batting out on the table, wrapped it around to the back and put a few quick staples in to secure it all together.

Next up was the fabric, which we trimmed to size and laid out nice and smooth over the batting to make sure we liked how the pattern lined up.

Then we flipped it all over again, folded under the edges and stapled the heck out of it. We did the long sides first, then the short sides, and finally the corners.
Here's Dan and my mom demonstrating some awesome teamwork. I'm sure they'll both be thrilled to see themselves on the blog. Love you guys! (PS - check out my mom's ombre sweatshirt. STY-L-IN!)

Step 6: Put the cushions on top of your pallets and squeal at your awesome new couch! Drumroll please...
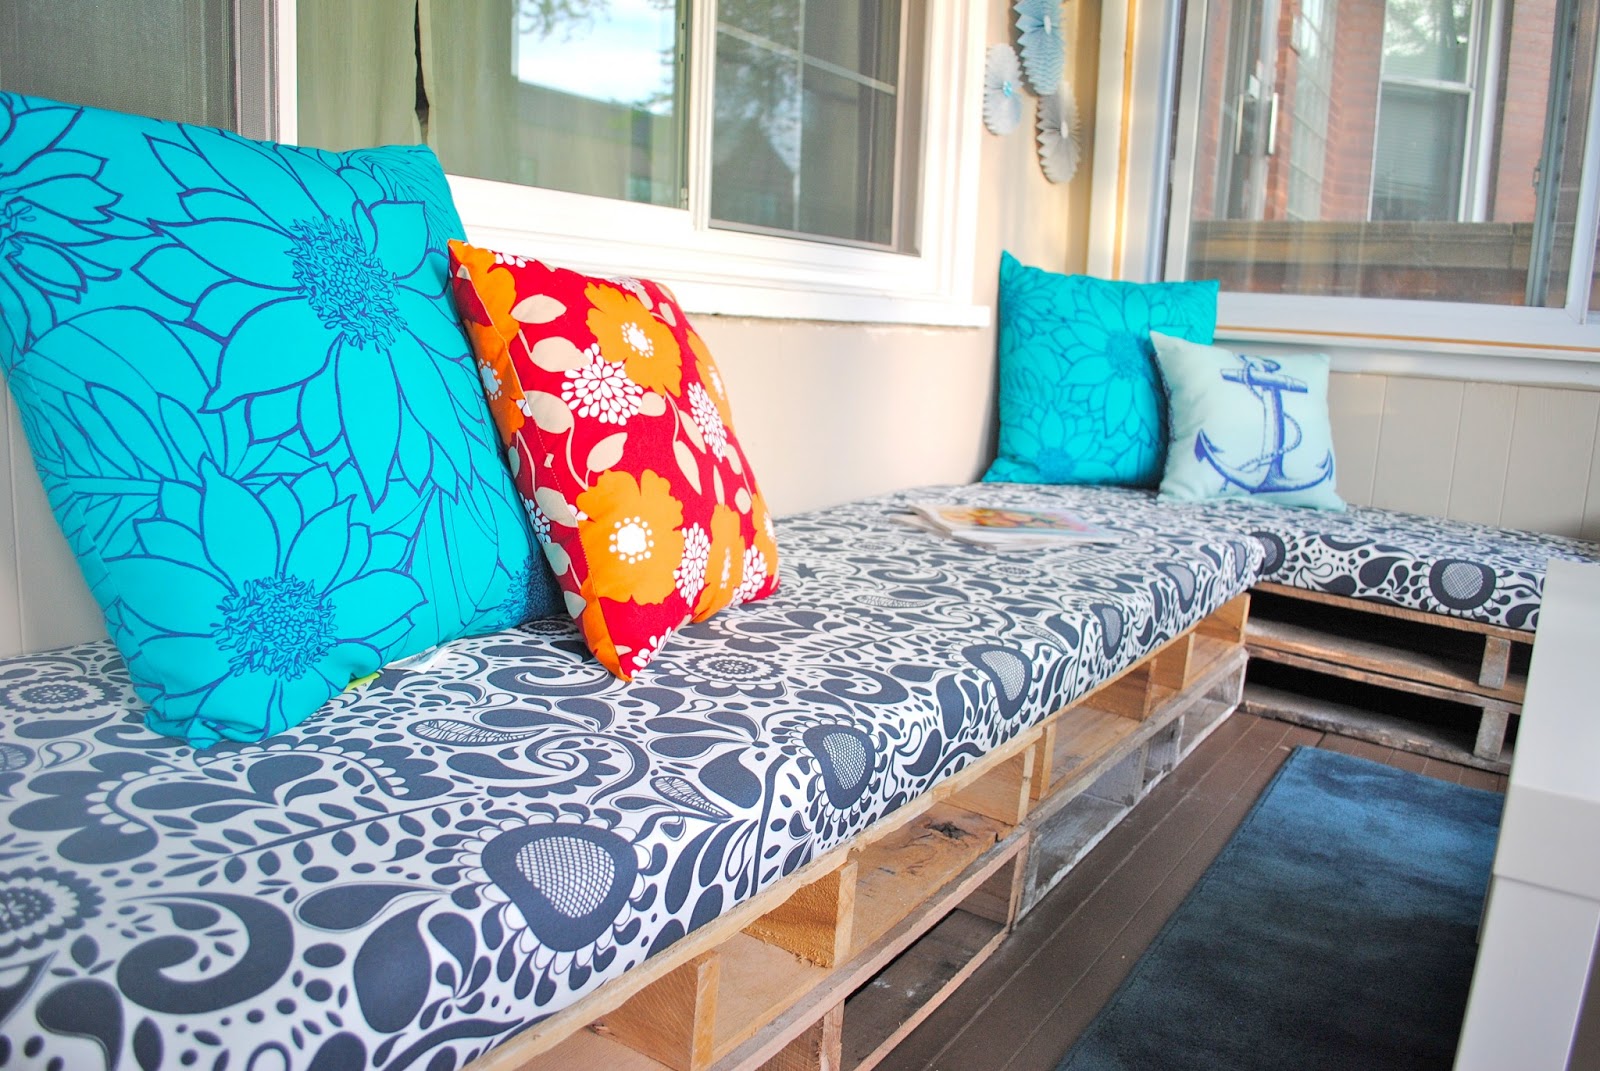
I mean for real... I'm in love.

Full shot of the couch and sneak peek at more of the porch:

Full disclosure: the kid sister and I are already planning sleepovers out on the porch this summer. I get the longer side of the couch since I've still got about a half inch on her height-wise ;).

Isn't it just great?

All in, this project cost under $150 (the foam alone was nearly $100 of that). While this is admittedly a bit more than I would have liked to spend, it's definitely much less than a sectional couch the same size would have run us, so I'll take it!
If you've made it this far, thanks for sticking with me! I'm linked up with lots of other crafty people over on Young House Love and Bower Power, and also on both guest host blogs - Sparkle Meets Pop and Red Bird Blue, so be sure to click over and check out a ton of other fun challenge projects. And please do stop back here for more DIY's in the next few days!
I love this! I have a teeny tiny (4x8) porch that we were talking about doing something like this on. Don't know if it will happen but now I totally want to come hang out on your porch instead.
ReplyDeleteThanks Mary! Are you in the Chicago area??? You can totally come hang out on my porch if you are! ;)
DeleteThis looks awesome! Very cute!
ReplyDeleteThank you so much!!
DeleteI am shocked how comfy it is! Great job you guys!!! Yay for game nights to come!
ReplyDeleteI may be willing to try genius juice again just for this occasion ;)
DeleteThanks for letting me help!! You know I love doing crafty stuff like this. And, I love how it turned out.
ReplyDeleteI couldn't have done it without you mom! Love you!
DeleteLove this. I have been obsessed with all things pallet related lately!
ReplyDeleteSo glad I'm not the only one hooked on pallets! Thanks for checking out my project :)
DeleteThis turned out really really well! I LOVE the idea of making a sectional. And you're right, even though you spent $150, it's MUCH less than you would've spent on a "real" couch :).
ReplyDelete- Chaney (came over from YHL!)
Thanks Chaney - I love what you did with the wood shims too!
DeleteLove this project. The foam padding looks so plush and thick and nice and very inviting. Love the fabric you used! What a great porch area!
ReplyDeleteYou just DIYed a sectional!! It's perfect for that space. I love the fabric and your campaign style cabinet you have!
ReplyDeleteAhhhh! This is so cool! I'll have to try this.
ReplyDeleteLooks great! Very inspiring ;) I've been wanting seating for my patio and this would be a great inexpensive way to go ;)
ReplyDeleteThanks for sharing!
xo- Kaara